Welcome to my blog post on how to install security camera wiring. In today’s digital age, ensuring the safety and security of our homes and businesses has become more important than ever. A key component in achieving this peace of mind is installing a reliable security camera system. However, before you can start monitoring your property, you need to tackle the task of properly wiring your cameras.
Don’t worry if you’re not an expert in electrical work or DIY installations. In this article, I will guide you through the step-by-step process of installing security camera wiring. From planning the installation to connecting power sources and positioning the cameras, I’ll provide all the information you need for a successful setup.
So grab your tools and let’s dive into this exciting journey towards enhancing your home or business security with professional-grade surveillance systems. By the end of this article, you’ll be equipped with all the knowledge necessary to confidently complete your own security camera installation project. Let’s get started.
1. Necessary Tools and Supplies
When it comes to installing security camera wiring, having the right tools and supplies is essential. Here are some of the items you’ll need to ensure a successful installation:
Wire cutters and strippers
These handy tools will help you trim and prepare the wires before connecting them.
Drill with appropriate bits
Depending on your mounting location, you may need to drill holes for cable routing or camera installation.
Screwdriver set
A good set of screwdrivers will come in handy when securing cameras or tightening connectors.
Fish tape or wire puller
These tools can make running wires through walls or ceilings much easier by providing a way to guide the cables without damaging them.
Connectors and terminals
You’ll need various connectors such as BNC connectors for video connections, power terminals for powering the cameras, and RJ45 connectors for Ethernet connections if applicable.
Power supply box or adapter
Cameras require power to function, so make sure you have a suitable power supply box or adapter that matches your camera’s voltage requirements.
Cable clips and ties
Use these to secure cables along their paths and keep everything neat and organized.
Surge protector/UPS (Uninterruptible Power Supply)
Protect your cameras from power surges by using surge protectors or UPS devices that provide backup power during outages.
Remember, having all the necessary tools ready before starting your installation can save you time and frustration later on.
2. Planning the Installation
Before diving into the installation process, it is crucial to spend some time planning where you want your security cameras to be positioned. This step is often overlooked but can make a significant difference in capturing clear and comprehensive footage.
Start by identifying the areas that require surveillance coverage. Take note of vulnerable entry points such as doors, windows, and driveways. Consider any blind spots or areas with limited lighting that may need additional camera coverage.
Next, determine the optimal camera placement for each area. Keep in mind factors such as line of sight, angle of view, and distance from potential threats. It’s essential to position cameras at an appropriate height to capture facial details and minimize obstructions like tree branches or walls.
Once you have identified the ideal locations for your cameras, create a detailed wiring plan. This will help ensure that you have enough cables and connectors on hand during installation. Measure distances between each camera and your recording device to estimate cable lengths required.
Consider whether you will run wires through walls or use surface mounting techniques. If running wires inside walls is not feasible due to structural limitations or aesthetic concerns, surface conduit may be used instead.
By carefully planning your security camera installation beforehand, you can save time and avoid unnecessary frustration during the actual implementation phase.
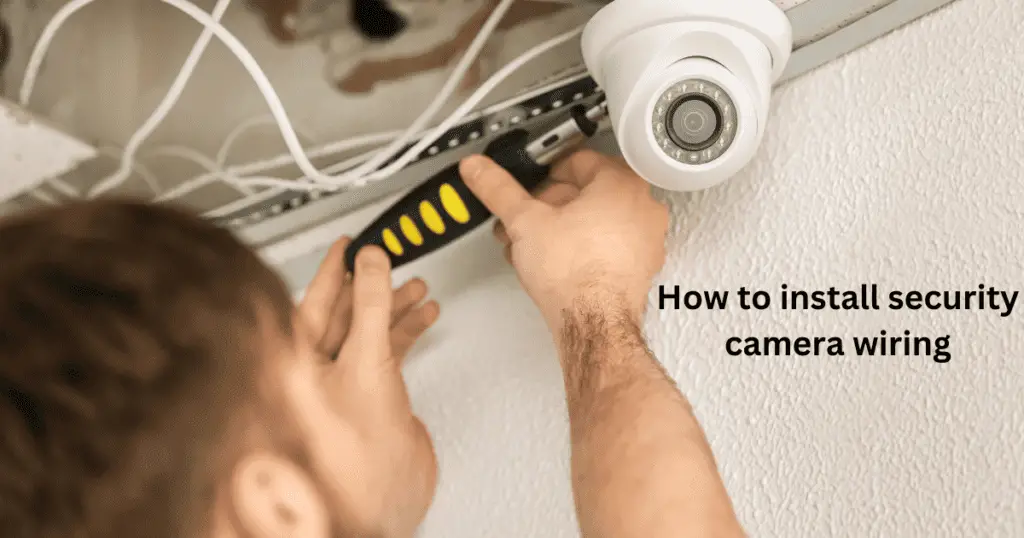
3. Running Wires and Cables
Now that you have planned the installation of your security camera system, it’s time to tackle the task of running wires and cables. This step is crucial for ensuring a successful and reliable connection between your cameras and the recording device.
Start by identifying the best route for your wiring. Consider factors such as distance, potential obstacles, and accessibility. It’s important to choose a path that minimizes any interference or damage to the cables. If possible, run them through walls or ceilings for a clean look.
Next, gather the necessary tools for this job: wire cutters/strippers, electrical tape, cable clips or ties, a fish tape (for fishing wires through walls), and a drill (if needed). These tools will make running wires much easier and more efficient.
Begin by connecting one end of your video cable to the camera’s video output port. Then carefully feed the other end of the cable along your chosen route towards your recording device or monitor. Use cable clips or ties to secure it in place every few feet.
Similarly, connect one end of each power cable to their respective cameras’ power input ports. Again, guide these cables along with your video cables towards their destination while securing them as needed.
If you encounter walls or barriers along your chosen route where drilling may be required to pass through obstructing areas like door frames or baseboards, take extra care not to damage any existing pipes or electrical wiring behind those surfaces.
Remember that safety should always be prioritized when working around electrical components. Turn off power sources before making any connections and use caution when handling live wires.
By following these steps diligently during wire running phase which includes planning routes effectively using appropriate tools safely without causing any damage so far in addition routing everything securely. Keep an eye out on my next blog post where I’ll discuss connecting cameras to their power source in detail.
4. Connecting the Camera to Power Source
Now that you have run the wires and cables for your security camera, it’s time to connect it to a power source. This step is crucial in ensuring that your camera functions properly and continuously.
First, locate an appropriate power outlet or junction box near the camera’s mounting location. Make sure it is easily accessible and not obstructed by any objects. If there isn’t one nearby, you may need to hire an electrician to install a new electrical outlet or use an extension cord specifically designed for outdoor use.
Once you have identified the power source, carefully strip the ends of the camera’s power cable using wire strippers. Be cautious not to damage any of the wires during this process. Next, match up the color-coded wires from both ends – usually red with red and black with black – and twist them together tightly.
To secure these connections, use waterproof connectors or electrical tape. These will provide protection against moisture and ensure a reliable connection over time.
After securing all connections, plug in the power adapter into an electrical outlet or connect it directly to a junction box if applicable. Double-check that everything is firmly connected before moving on.
Test your camera by turning it on and checking its functionality. Ensure that you are receiving clear video feed from your security system monitor or mobile device app.
By following these steps carefully, you can successfully connect your security camera to a power source without any complications.
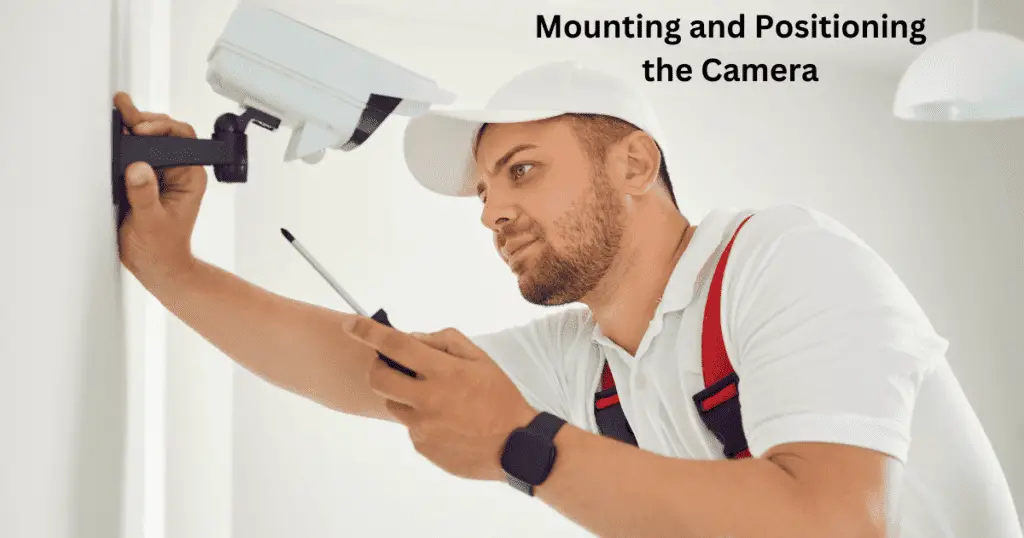
5. Mounting and Positioning the Camera
Mounting and positioning the camera is a crucial step in ensuring optimal security surveillance. Before you begin, make sure you have selected an ideal location for your camera that provides a clear line of sight and covers the desired area. Here are some tips to help you with this process.
Start by using a drill and screws to mount the camera bracket securely onto a stable surface such as a wall or ceiling. Ensure that it is positioned at the correct height for maximum coverage and minimal tampering.
Next, adjust the angle of the camera to ensure it captures the desired view. Consider factors such as lighting conditions, potential obstructions, and areas of interest that need monitoring.
It’s important to avoid mounting cameras in areas where they can be easily reached or vandalized. Opt for strategic locations that provide both visibility and safety.
Once mounted, test the camera’s field of view by connecting it to your monitor or recording device. Make any necessary adjustments before finalizing its position.
Remember, proper positioning plays a vital role in maximizing security coverage while minimizing blind spots. So, take your time during this step to ensure optimal results from your security system installation.
6. Testing and Troubleshooting
Once you have completed the installation of your security camera wiring, it is crucial to test and troubleshoot the system to ensure everything is working properly. This step will help identify any potential issues or malfunctions before they become a problem.
To begin testing, start by checking all connections to ensure they are secure. Make sure the wires are properly connected to both the camera and power source. If there are any loose connections, tighten them up for a reliable connection.
Next, power on the system and check if the camera is receiving power. Look for any indicator lights that show the camera is functioning correctly. If there are no lights or signs of activity, double-check the power source and make sure it is providing sufficient power.
After confirming that the camera has power, it’s time to check if it’s capturing clear footage. Use a monitor or connect your system to a computer to view live video feed from each camera. Check for any distortions, blurriness, or other image quality issues.
In addition to visual inspection, also listen for audio output from cameras equipped with microphones. Ensure that sound is being recorded clearly without any background noise or interference.
If you notice any problems during testing such as poor image quality or lack of audio recording, try troubleshooting these issues first before contacting technical support. Start by reviewing the user manual provided with your security cameras as it often contains helpful troubleshooting tips specific to your model.
Common troubleshooting steps include adjusting camera settings such as focus and exposure levels, ensuring proper positioning of cameras in relation to lighting conditions, and verifying network connectivity if applicable (for IP-based systems).
It may also be necessary to inspect cables for damage such as cuts or frayed ends which can affect signal transmission quality. In case of damaged cables identified during this process replace them promptly with new ones assuring optimal performance throughout your surveillance system.
7. Additional Tips for a Successful Installation
Let’s discuss the Additional Tips for a Successful Installation.
Use Proper Cable Management
While running wires and cables, it’s important to ensure proper cable management. This not only keeps your installation neat and tidy but also helps in troubleshooting any issues that may arise later on.
Label Your Wires
To avoid confusion during the installation process, make sure to label your wires properly. This will save you time and effort when connecting the cameras to the power source or DVR.
Consider Weatherproofing
If you’re installing security cameras outdoors, it’s crucial to choose weatherproof cameras and use appropriate waterproof connectors for all outdoor connections. This will protect your equipment from damage caused by rain or extreme temperatures.
Optimize Camera Placement
Carefully consider the placement of each camera to maximize their effectiveness. Install them at strategic locations where they can capture clear footage without any obstructions such as trees or shrubs blocking the view.
Secure Your Wiring
After completing the installation, secure all wiring using clips or conduit to prevent accidental damage or tampering.
Regular Maintenance Checks
Once installed, perform regular maintenance checks on your security camera system to ensure everything is functioning properly. Check for loose connections, clean lenses if necessary, and update firmware regularly.
Educate Yourself on Security Camera Systems
Take some time to educate yourself about different types of security camera systems available in the market and their features before making a purchase decision.
Remember these additional tips while installing security camera wiring for a successful setup that provides optimal protection for your property.
Conclusion
As we wrap up this guide on installing security camera wiring, it’s important to remember that proper planning and execution are key to a successful installation. By following the steps outlined in this article, you can ensure that your security cameras are set up correctly and provide reliable surveillance for your property.
Remember, when it comes to choosing the right tools and supplies for the job, always opt for high-quality options. This will help prevent any issues down the line and ensure that your camera system operates smoothly.
During the planning phase, take the time to carefully map out where you want your cameras positioned and consider factors such as lighting conditions and potential obstructions. This will help optimize their effectiveness in capturing footage.
Running wires and cables should be done with care to avoid any damage or interference. Take note of any potential hazards or obstacles along the way, such as electrical outlets or structural elements.
When connecting your cameras to a power source, make sure to follow manufacturer instructions for a safe and secure connection. Double-check all connections before mounting your cameras in their final positions.
Properly positioning your cameras is crucial for maximizing their effectiveness. Consider factors such as angle of view, range of coverage, and accessibility for maintenance or adjustments.
Once everything is set up, don’t forget to thoroughly test each camera individually before relying on them for monitoring purposes. This will help identify any issues early on so they can be addressed promptly.
By taking these precautions into account throughout every step of the process – from planning through troubleshooting – you can ensure a successful security camera wiring installation that provides peace of mind
Frequently Asked Questions (FAQs)
Q1. Can I install security camera wiring on my own?
Yes, with some basic knowledge and the right tools, you can definitely install security camera wiring on your own. Just make sure to follow the steps outlined in this article.
Q2. How long does it take to install security camera wiring?
The time it takes to install security camera wiring will depend on various factors such as the number of cameras you are installing and the complexity of your setup. On average, it can take a few hours to complete the installation process.
Q3. Can I hide the wires for a cleaner look?
Absolutely! To achieve a clean and professional look, you can hide the wires by running them through walls or using wire molding. This helps prevent tripping hazards and keeps your installation looking neat.
Q4. Are there wireless options available for security cameras?
Yes, there are wireless options available for security cameras that eliminate the need for extensive wired installations. However, keep in mind that these wireless systems still require power sources and may have limitations in terms of range and interference.
Q5. Do I need any special permits or permissions to install security cameras at my property?
The requirements regarding permits or permissions for installing security cameras vary depending on your location. It is recommended to check with local authorities or consult an expert to ensure compliance with any regulations applicable in your area.